If you’re experiencing Wi-Fi problems after updating to Windows 11 23H2, use these troubleshooting methods to get back online quickly.
After updating to Windows 11 23H2 from an earlier version (including Windows 10), you may suffer Wi-Fi issues that negatively influence your experience. Some of them include missing settings, inability to connect to the internet, and the wireless adapter failing to function.
Typically, problems arise as a result of a defect in the feature update, adapter driver compatibility, or unauthorised modifications to the wireless settings. For example, the Wi-Fi driver may get corrupted after an update. When you upgrade your operating system, the wireless adapter driver may become incompatible. It might also be the result of a setup issue.
If you are unable to connect to a network, the laptop randomly disconnects from the Wi-Fi access point, or you observe low speeds, Windows 11 provides several troubleshooting tools to resolve most Wi-Fi difficulties.
This post will tell you how to fix wifi issues after installing the Windows 11 2023 Update.
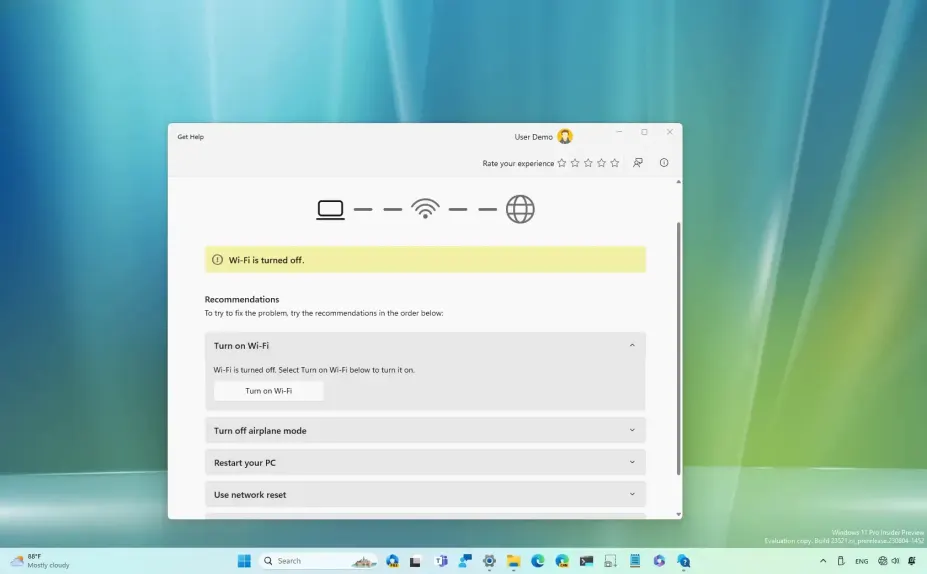
Wi-Fi repair using Get Help
To troubleshoot Wi-Fi difficulties after automatically updating Windows 11 23H2, follow these steps:
- On Windows 11, open Start.
- To open the app, search for Get Help and pick the first result.
- Find Network Troubleshooter and select the “Launch the network troubleshooter” option.
Please keep in mind that if you do not have network access, the app will open immediately to the help page to remedy the networking issue.
- To resolve the wifi issue on Windows 11 23H2, follow the guidelines, which include turning on Wi-Fi, turning off aeroplane mode, restarting the computer, and resetting the network adapter.
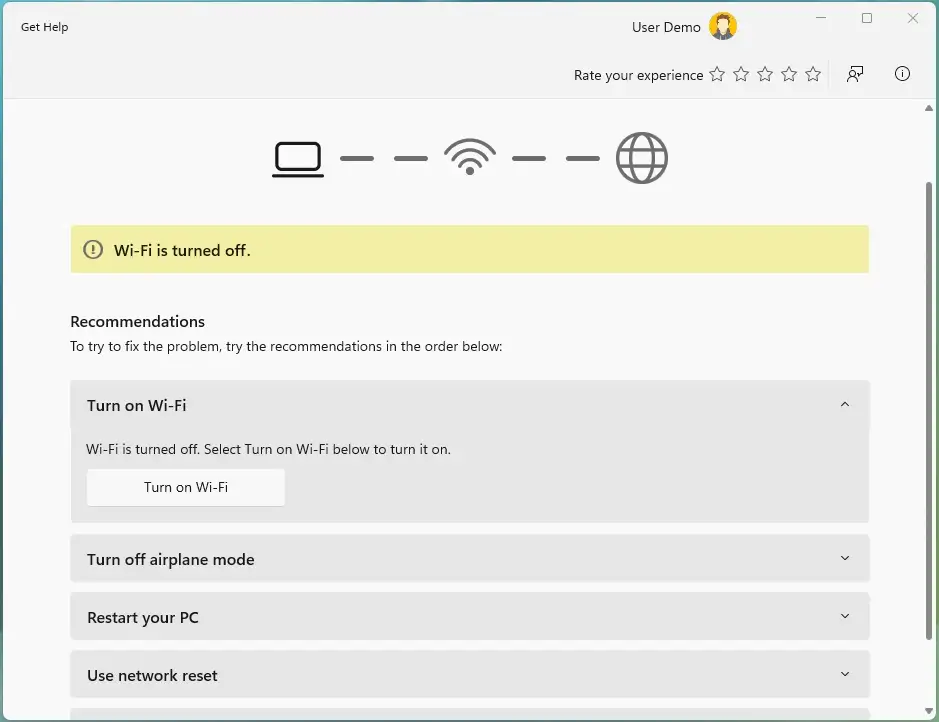
- After you’ve followed all of the suggestions, the device should be able to connect to the wireless network.
Wi-Fi issues can be resolved by performing a network reset.
As indicated by the Get Help app, you may use the network reset option to remove and reinstall network adapters, which will usually cure most wireless issues, such as sluggish speeds or other difficulties connecting to the internet.
To resolve connection difficulties on Windows 11 23H2, perform the following steps:
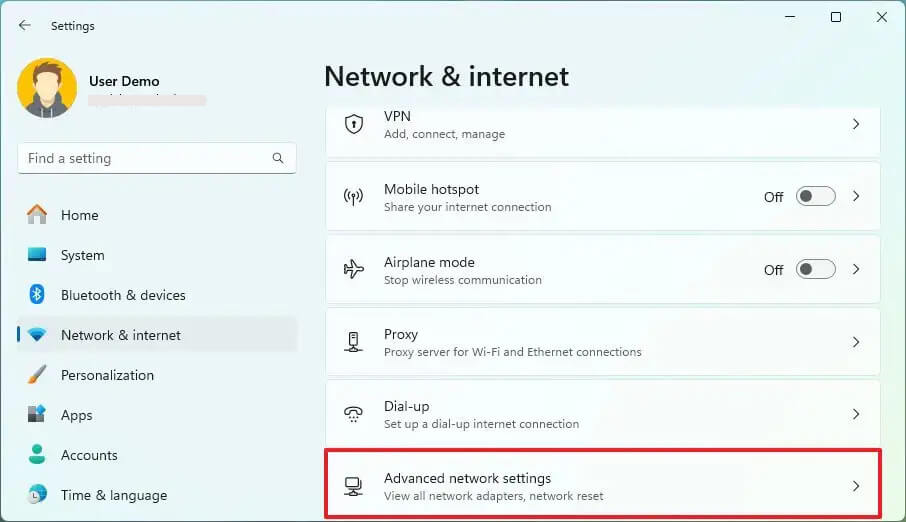
- Open ‘Settings’.
- Click on ‘Network & internet’.
- Click the ‘Advanced network settings’ tab.
- More settings > select Network Reset.
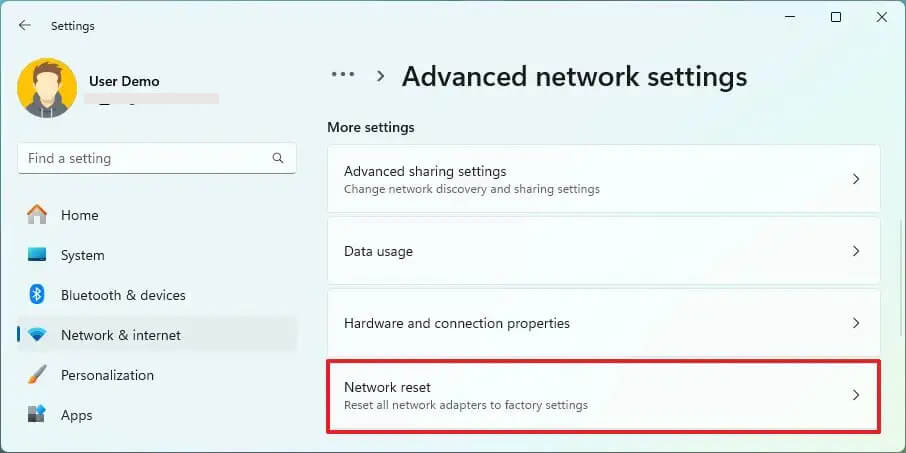
- To resolve Wi-Fi issues on Windows 11 23H2, click the Reset now option.
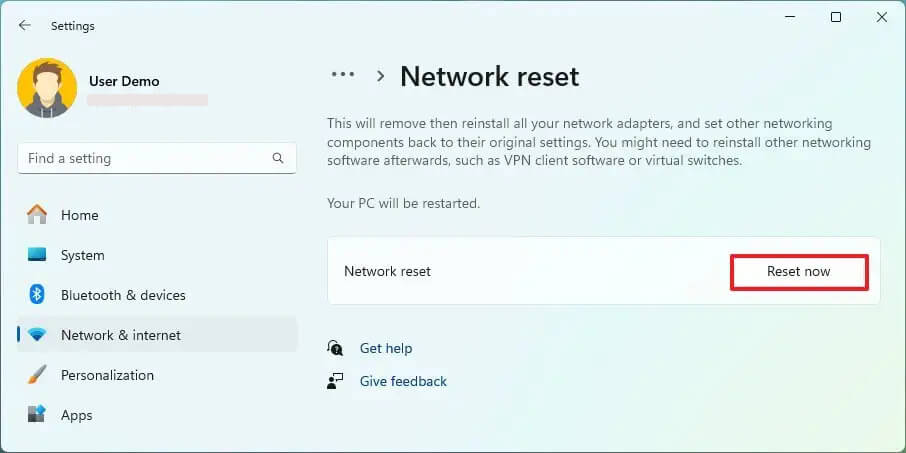
Please keep in mind that this function automatically uninstalls and reinstalls all of your network adapters (Wi-Fi and Ethernet). You may need to reinstall or adjust additional networking software, such as VPN client software, once you finish the operation.
- Click Yes to confirm.
- Click the Close button.
- Restart your computer.
After you finish the procedures, you may need to reinstall certain networking software. You will also need to manually rejoin to the wireless network.
You are finished once you regain connectivity. If the issue persists, try the approach listed below.
Wi-Fi network adapter driver update
The Wi-Fi adapter may not be operating properly because the device is utilising an outdated version of the driver. You may fix this by downloading and installing the most recent driver from the manufacturer’s support page.
You might also try using an earlier adapter driver version to alleviate the problem until a permanent solution is ready.
If you can’t find a fresh network adapter update, look for a beta version of the driver. It may occasionally function with a newer version of Windows 11 23H2. It is also advised that you follow the manufacturer’s instructions while installing the driver package. If you can’t locate the instructions, the steps below will guide you through the process.
Follow these procedures to upgrade the wireless adapter driver on Windows 11 23H2 upgrade:
- Open Start.
- To open the app, search for Device Manager and pick the first result.
- Increase the size of the Network adapters branch.
- Right-click the Wi-Fi device and choose Update driver.
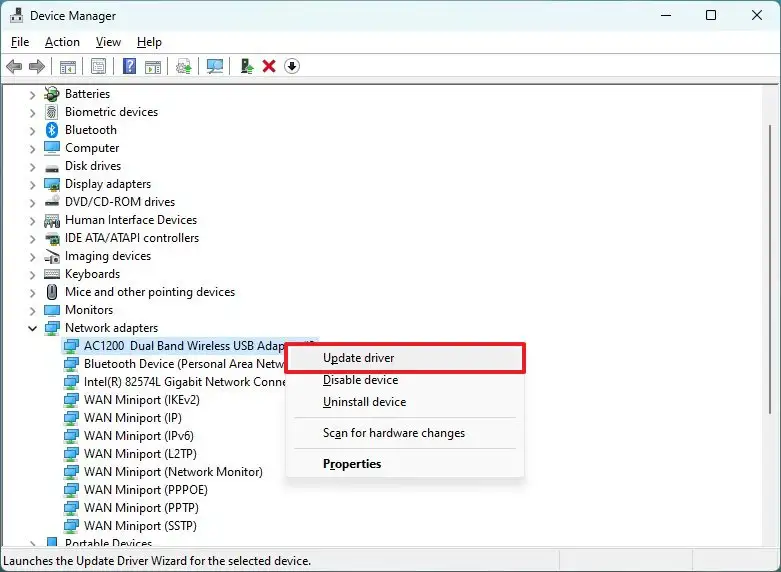
- Click on “Browse my computer for driver software”.

- To find the adapter driver, use the Browse option.
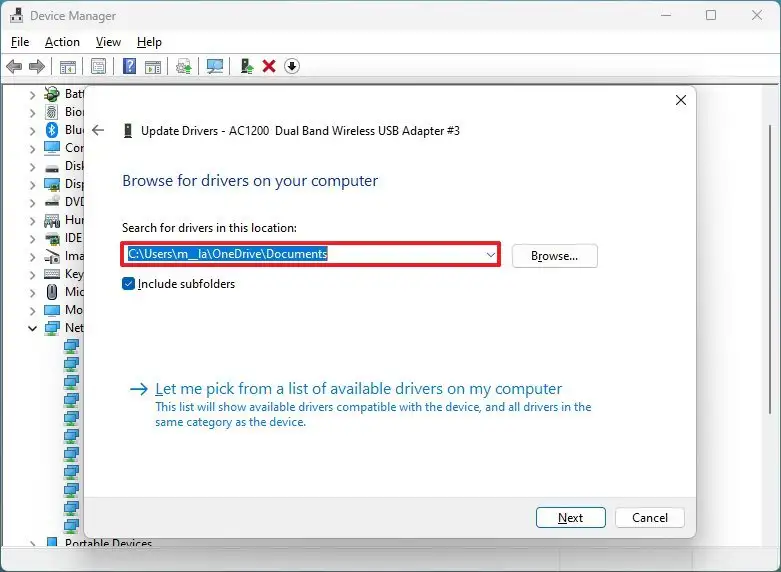
- Check the Include subfolders option.
- Click the Next button.
When you finish the instructions, the Windows 11 23H2 should be able to connect to the access point and the internet.
Uninstall Windows 11 23H2 to restore Wi-Fi.
If you’ve tried everything and the problem remains, it’s possible that it’s a bug with version Windows 11 23H2, in which case you’ll have to wait until the next system or driver update.
You can also revert to the earlier version of Windows 11 until the Wi-Fi issue is rectified. Furthermore, access Settings > Network & internet > Advanced network settings, Wi-Fi adapter, and click the “Edit” button to open the network adapter details and ensure that the settings have not been changed.
Finally, restart the router and access point to ensure that these devices are not the source of the problem.


